Claud's Learning Curve Logo Google
 

Monday 18 February 2008

My ESky Honeybee FP - Crash and Burn!

Oh well the day came, I was flying happily, with not great control out in the open in a nice big field, and then low and behold, NOSE DIVE! Completely lost control of my heli and crashed with quite a thud from about 20ft in the air....

Bad news for me, good news for you lot!

Coming soon, a huge number of "How to's" coming for your use.

  1. How to replace the tail boom
  2. How to fit a new chassis
  3. How to fit the upgraded skids and tail fins
  4. And probably a few more.
Thought I would just blog the fact that from one's misfortune comes some good. Alas, some minor tape and a bit of glue isn't going to get me back in the air this time! Looks like I'll be getting out the soldering iron, and a load of spare parts!

I'll be back in the air in no time...

Happy Flying!

Friday 1 February 2008

How to balance the flybar on an ESky Honeybee FP Helicopter

I have noticed that a number of searches of this blog regarding balancing the flybar on the ESky Honey Bee helicopter that all link to the replacing the flybar post, so I decided to add a shorter version on balancing the flybar only. As before you can click the images for a larger version

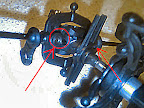
  1. First of all you will need to loosen the grub screws which hold the flybar in place in the control frame. This is detailed in one of my earlier posts How to replace the broken fly-bar(click here for the post), but here are the pics for quick reference. The red arrows show the location of the grub screws in question. You will need the small allen key supplied with your ESky Honey bee FP heli kit.
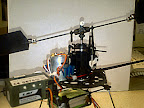
  2. I found the easiest way to balance the flybar was on the heli itself, using the weights and paddles on the fly-bar as counter balance weights to get the correct balance of the fly-bar. The following image shows an un-balanced fly-bar with weights and paddles attached.

    Put the flybar weights and paddles onto the flybar pointing vertically upwards (so that the weight is better for balancing, as shown in the image above) and ensure they are pushed onto the fly-bar as far as they will go, and then move the weights right out to the paddles and tighten them (enough to hold them in place). Try not to over tighten the weights as this is likely to crack the flybar and you'll find yourself going through the "how to replace your flybar" procedure a lot sooner than intended!
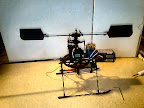
  3. With the paddles and weights in place push and/or pull the flybar one way or the other until both paddles are level and do not tip one way or the other. It's a good idea to do this bit on a nice flat stable surface. I found that bouncing the tip of one paddle and adjusting until the balance was correct. The picture below shows my fly-bar balanced using this exact method.
  4. Once you have completed your balancing process, you simply need to re-tighten the grub screws (remembering not to over-tighten them to avoid damaging the fly-bar) which hold the flybar in place and then re-attach the main blades and you're done!

Happy flying!